Tuesday, October 30, 2012

Puppy love!


Hi everyone! I'm so excited to be sharing my first layout using the Willow Creek kit! I love the rich, vibrant colors of the kit and decided to showcase some of the beautiful papers by cutting them into one inch squares and piecing them together, like a quilt.
For the flowers, I glued the Lawn Fawn twine, included in the kit, in a circle onto pieces of chipboard and added buttons from my stash to the center.

Here are a few close-ups for you.


Willow Creek is jam packed with lovelies...you can pick yours up in the shop!

Thanks for coming by...have a fabulous week!

Monday, October 29, 2012

Fall - Willow Creek Style!

 
Good Monday Morning, friends!
It's me -


here with a "oh hey, fall!" post for you!
 
before I show you my creation - let me tell you something.
I got my November "Willow Creek"  kit a few days ago
& the MOMENT I got it, I knew I had to start
creating with it that second. Because I had some plans..it KILLED me to put
it aside & play later.
Well...later came & play I did!
I couldn't WAIT to make something with this fabuous kit:


delicious, right?
have you seen the video Virginia did on Friday about this kit?
if not - go check it out here:  Willow Creek on Friday
and watch Virginia show you everything in it. you'll be amazed!
 
Here's my layout I created:

(model:  Presley Blake - my amazing niece!)
 
here's some close up shots:


I went with my family to the patch  & shot these pics of sweet little Presley.
These photo's were PERFECT for this kit!
 
I also cut those fun leaves with my Silhouette Cameo & had a totally different idea
for them, but in the end, love the way they look. 
 
A little tip before I go - always check the end of your paper (where the barcode is)
for cute sayings (by the mfg of course!) or on the back - a border!
Here I used several different borders that were cut from the bottom of my papers.
and that tag? cut from one of the patterned papers in the kit.
seriously...you won't regret it. get this kit.
Happy Fall, y'all...
have a GREAT day!


Friday, October 26, 2012

Willow Creek!


Happy Friday, friends! 

The Willow Creek kit is now up for sale, and if you're not a subscriber, you will want to go grab this kit in the shop as soon as possible before it sells out! 


The design team will be bringing you loads of lovely inspiration from this kit next week, and I'm working on something special to share with you over the weekend. 

Looking for more closeups of the kit contents? 

Click here! Or watch my video above for a good look at everything in the kit! 


Wednesday, October 24, 2012

Inspired by Pinterest . . .

Photobucket

When my creative juices run dry & am looking for something to get me scrapping again, Pinterest is my go-to place :)  I found this neat ticker tape canvas not too long ago.  I love the collage type look it displays of various squares & rectangles.

Photobucket
I decided to incorporate this collage idea within my layout for this week.  Here is what I created using the Student Council kit . . .

Photobucket

You'll notice in this close-up the variety of patterned papers I used - all from the kit!!!  So many fun prints and colors :)

Photobucket

I decided to use the cassette die-cut as the base of my title work.  Even though we don't see many these days, I thought it was fun to add this to my "techie" themed layout.

Photobucket

Hope you are inspired to gets some scraps together and create a paper collage of your own!!!  Have a fabulous Wednesday!!!

Tuesday, October 23, 2012

Jenni Bowlin Stencil Lettering Guide Die Cut Paper


I'm professing my love for the The Jenni Bowlin Stencil Lettering die cut paper in the Student Council kit! I can't believe it took me until the end of October to cut into it 1) because I've had the idea for this title since I first opened the kit and 2) it is so versatile and I should have been using it on every layout!

To create my title I simply cut out the letters I needed for my title and backed each letter with patterned paper...

Just think of all the different looks you can get with different patterned paper behind the stencil. So versatile!

The kraft strip along the top was also from the die cut paper. I used the punched holes as a guide for threading some twine through and tying it off with a bow.

Here are a few close-ups:


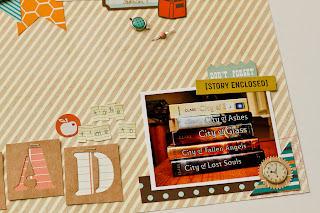
Growing up, I read all.the.time! As I got older and the kids came along my reading time was limited. Any spare time I had was spent scrapbooking! :) It has been kind of fun picking it up again and I had a lot of fun creating this layout showing not only my love of reading, but my son's too!

Thanks for coming by, have a great week!

Monday, October 22, 2012

Happiness Is......

...in a jeep!

No really, it is. Well to me and my husband anyway...ha! We love to just get in our jeep & go on any and all adventures. Mainly to antique stores. Just walking through & seeing all the history...
it's one of our favorite things to do.

I've highlighted that in my layout I did for today:
 
I combined the Student Council kit with the Evening Stroll kit to get just the
perfect embellishments & look I was going for.
Which was a whimsical, shabby, eclectic, messy, yet still a clean look.
I'm really happy with how it turned out!

If you have an iPhone, you should get the app called Instagram.
You can load photo's & share with friends as well as on Facebook, Twitter, email, etc...
you can edit photo's there too! it's a FUN app.
I made my grid using Insta Pic Frame app, edited the photo's there and loaded them
on Instgram.
From there, I used the app called Postal Pix to order my Instagram photo's.
You can print any size! The big square is a grid that I made into a 5" x 5".
The newest size they have it 2" x 2".
The 3 photo's on a strip at the top are the new 2x2 size. I'm in love.
I'll definitely be printing more!
 
Anyway..
I hope you enjoy my post today.
Here's a couple of close up detail shots:


have a great Monday!
thanks for stopping by today.

Friday, October 19, 2012

Please Call


One of my best friends moved to Alaska this week, which, from Alabama, feels like pretty much the other side of the world. 

One of our friends caught this picture of us at the airport, with our eyes full of tears. It is the most sad and sweet photo and I definitely wanted to scrap it! 

(made with the Student Council kit!) 

I made these little pictures for her family's going away party, using my Silhouette machine: 


I was left with the negative space vinyl pieces, and wanted to use them as a stencil for this page, so I pulled out the Heidi Swapp Shine spray from the kit and went to spraying! 

I LOVE how sparkly and opaque this mist is! 


Noel has a ton of new colors from the Shine line- you should go check them out in the shop and add a few to your order... I promise, you will love this mist! 

Thursday, October 18, 2012

Tis the Spooky Season!


G'Morning fellow scrappy friends!

I hope everyone is having a lovely week and is getting all excited for Halloween in just a lil under two weeks!

Halloween is my absolute FAVORITE holiday.  Ever since I was a kid.  I've always been fascinated by the spooky stuff, movies, books, history, and let's not forget all the candy :)

I was so excited to get my hands on Noel's Something Wicked Kit and knew that I would use it, not only for Halloween minis and layouts, but for some spooky projects as well.

If you are on pinterest, you've seen the yarn wreath on more than one occasion and I'll confess, since I first saw them a couple of years ago, I've been hooked on making them.  I think I have one for almost every month of the year to hang over my mantel and I've made them as gifts and have a ton of mini ones to put on the inside of our doors in our house.

I just love em!

So I know that I would def. be making one with the kit.


First, I purchased these perfect sized wreaths at the Dollar Spot at Target.  What is so great about these wreaths is that the back is flat.  I thought this was genius because I knew that even with the bulk of the yarn, it would lie flat against the wall, door, whatever.

Then I got my handy hot glue gun out and got to wrapping it with a chunky yarn that I picked up from Michaels.

After it was completely covered, I used some of the fabulous twine in the kit and wrapped it around as well to give it a pop of color.

Now initially my wreath was going to be hung but the more I played with it, the more I decided that the cloud patterned paper was going to be hot glued to the back to kinda create a "diorama" so to speak.  I then used my trusty cameo to cut out the owl in the tree, adhered that to the wreath and then had a blast embellishing with bits and buttons from the kit.


I really am pleased with the way it turned out and I love that I created something that I can display every Halloween!

That's what I love about Noel's kits.  They are so jammed packed that they can be used for soooo many projects!

Happy Halloween :)


Wednesday, October 17, 2012

Let's Get Those Creative Juices Flowing!!!

Photobucket

 Well . . . it's just about the middle of the month and that means sketch time!!!!  Yay!! Here is the sketch for October's challenge . . .

Photobucket

And here is a page I came up with using October's Student Council kit . . .

Photobucket

Below you can see a close-up of my title work.  I choose to combine a small word sticker with the Thickers & also added in some of those adorable October Afternoon brads from the kit :)

Photobucket

I got a little bit "punchy" on this page & raided my punch stash to create these fun leaves & circles.  A little pen detail really helped them to "pop" off the page!!

Photobucket

Now, are you up for the challenge???  Grab your Noel Mignon kit or some supplies from your stash & use October's sketch to create your own page!!!  Submit your layout to our forum HERE and one participant will be randomly selected to win $10 to go shopping in the Noel Mignon store :)  Can't wait to see what you all come up with!!!!


Tuesday, October 16, 2012

Driving to School


Happy Tuesday, everyone! I'm back with another layout using the Student Council kit and I used three, yes, THREE photos on my page. So for those of you who like to get more photos than one down on a page, I hope this inspires you in some way! :)

I used the photos that I snapped of the kids on their first day of school this year, and I realized as they drove off that this was the first year they didn't need me to drive them to school (sniff) and that I only have two more years to take "first day of school" photos (sniff, sniff).

The Pink Paislee papers in the Student Council kit make wonderful backgrounds for a layout with their subtle tone-on-tone designs and small accents built in. I was inspired by the stars at the bottom of the "Incredible" sheet and carried the theme through the layout.
To create the circle border I mixed and layered papers, brads, and flair to add interest and dimension.

Here are a couple close-ups:

I'm not sure I've ever mixed so many patterns on one layout! But you know, when you do it in small doses, it totally works! Give it a try...it's fun!

Thanks for coming by and have a fabulous day!


Monday, October 15, 2012

*That Was Easy!*


It's Monday! It's still Monday!
Hi friends. I'm so sorry I'm late in my post today.
It's officially....MONDAY! (ha!)
 
Just dropping by to share a couple of things I just created using one of my
MOST favorite Noel Mignon kits. It's the ::sold out:: October Student Council kit.
I'm so sorry it's sold out BUT did you know you can get the
Student Countil LIMITED edition kit??
You can! go here:  Student Council Limited
 
 
 What I love the MOST about this kit is it's not just a girl or boy
or like it's title..a school kit - it's an EVERYday kit!
Here I used the kit on one of the cutest pics I just took with my iPhone
of our puppy, Lilly - our little "easy button"
 
I'm so into layering with strips right now for some reason.
I had a blast doing thin strips as well as thicker, wider ones.
And those wooden bubble phrases - wow. I could use those EVERY DAY on every project!
Totally adore them.
 
here's a couple of closer shots:


I also put together a quick little card with this kit:
 
to send to a special little girl I know - well she's not so little anymore.
My 21 year old to tell her how proud I am of her!
 
Enjoy the rest of your Monday!
Thanks for letting me share with you today....