Saturday, February 28, 2009

Tu- Tu Tulle


I have a new obsession.......tulle! Like I needed another obsession...right? I have found myself grabbing this light airy fabric a lot lately. I have been using it on my LO's as well as my cards. What do you need to attach tulle? Colored floss, fabric glue, or thread. Sometimes a combo of the three. For this first LO, I threaded my button and snowflake with floss, then tied it around the center of my tulle/tinsel combo. Using fabric glue, I glued the snowflake/tulle combo to my page. When it was dry I twisted the tulle a bit and tied buttons threaded with floss to it. Use fabric glue to tack down your ends.


This next LO is quick and easy! Just tie a length of tulle around the page. Cut excess ends off and add a drop of glue to underside of bow. I added some pretty stick pins to center.


For this LO, I tied my flower threaded with floss to center of tulle. (Tulle is a pale yellow here) Again, I twisted tulle and used fabric glue to tack it down. (Just an FYI, the current kit, Nightingale includes this pretty yellow tulle! This LO was created using this awesome kit!)

You can also create "faux" skirts with tulle! For this card I took a rectangular piece of tulle and folded it over several times. (Otherwise tulle it is very transparent). Take a needle and thread, use a straight stitch to go across the "waistband." When done, pull thread to gather the waistband. Knot thread. Again, use fabric glue to position "skirt" where you want it.


I did the same thing for this skirt, but added rhinestones to her waistband.


How about tying a bow with tulle? That's what I did here for this card. I wanted the cherub to look like she was holding it up! Easy right? : ) (Again, used the Nightingale kit for this card!)


Used lot of the black tulle for this one!

I hope I've inspired you to look at tulle a whole new way! It is a fun, light, easily manipulated fabric! : )


Friday, February 27, 2009

Sisters

I have been having some fun with vintage photos lately. This is one that sits inside one of my bookshelves at home and I have been wanting to scrap it for quite some time. So I opened the "Nightingale", and got busy! The only things not included in the kit are the brown thickers, and the Hambly rub on, which I used on top of a vintage book page to have the aged paper look. This is a fun idea for vintage LO's, and the front and back covers of old (not valuable) books always have blank sheets to use as journaling spots!


TFL and have a great weekend!!

Thursday, February 26, 2009

My Grandparents and 2 @ 5

There are so many fun new papers coming into the shop, and I'm having a ball playing with all of them! The papers I chose for this old photo of my grandparents is from MME and is called "French Flea Market". All the papers are in the pack, other then the small Hambly hearts I cut from a small leftover piece I had on hand. The large D's are from Scrapworks and the smaller letters are the velvet thickers. I rubbed a Hambly frame on the opposite side of the fruit tree paper and then hand cut around it for my journaling spot. I finished it off with some MF lace.

I'm so thankful for the new release from Cosmo Cricket called Lil' Man. It's so perfect for all my boy shots! All the papers, and the top title, are from the pack. I added a small Hambly swirl rub on, a random chip flower from my stash, and my current favorite thicker, the red felt playroom.


TFL and have a fantastic day! :)

Wednesday, February 25, 2009

Birthday Party Album


The idea of using a "two-up" album, scrapbook-style, is not a new one, but I still think it's a great one! I have a really hard time scrapping event photos (like from birthdays and holidays), so an album like this where I can keep all the photos together for display, and still make pretty is perfect for me!

I used one of my favorite lines from Cosmo Cricket, Hello Sunshine, because it's very happy and great for boys and girls! I also added in some of my favorite Thickers (oooh they're on sale!), some Stickles, a few other stickers from my stash, and a little old school paper piecing! ;)
(These are the intro page to each party.)

I want to add a tab in each section of the book for each birthday party featured; as you can see, I'm not quite caught up on our birthdays (this picture is from a couple of years ago!). I'm also adding journaling cards in on each section to give a brief description of the party or anything else I want to add!

Tuesday, February 24, 2009

Funny Thing About Joy.....

I created this fun LO inspired by Noel's newest challenge! You were to use the Curly Girl site as inspiration! And how could you not by all the great sayings they have there?! I picked this one to put with these cute pics of my little niece. She had just gotten a new toy for Valentine's Day and wasn't sure if she should laugh or cry! I pulled out all of my dusty alphabet stamps and went to town! The rest of the LO uses Noel's Nightingale kit. (The only thing not in the kit are the rhinestone swirls) Have I told you lately how much I LOVE this kit? I even used the little piece of tulle I had left!


I hope you find the time to participate in this week's challenge! I am sure you will find something to inspire you!

Monday, February 23, 2009

Full of Personality

Yep! I'm doing two posts today! I just couldn't help it! I had this layout in the works earlier today and just finished it and wanted to share it with you! I am having so much fun with the Nightingale kit! LOVE the colors! LOVE the papers! LOVE all the fun embellishments!

For this one I spent some time cutting out the birds from the Jenni Bowlin paper. I really like how it looks over all the layers of paper. To add some interest and dimension to the brown chipboard letters from my stash, I added the Distress Stickles (included in the kit) on top of them. Fun stuff!


Happy Scrappin!
Jana

Spring Banner

When I saw the mini book in the Love Story Kit, I immediately thought of flowers. I decided to make a spring banner out of it. The papers, flowers and brads are from the kit. I found the ribbon and the jewels in the dollar section at Michael's awhile back and the green K & Co. letters are from Michael's as well. :D Thanks for looking!


Saturday, February 21, 2009

Time Saver

I know we all wish we could have plenty of time to scrap -- but usually that is not the case. Here is a tip that can save you a bit of time.

When I started scrapping I picked up this tip and it is one that is super helpful. With cardstock cut the most popular size photos that you tend to use. Cutting more that one of each size is helpful as well. These can help you when you are putting a page together and are not quite sure how big or small you may want the pictures. And even if you don't print at home this can also help you figure out what size photos you may want to order.

I keep these within reach so that if I want to add more photos I can easily decide which size. Hope this was helpful!


Spring is near..and i cannot wait


this was a postcard i received from my dear friend Rhi Rhi and i knew i had to scrap it...it went perfectly with the new kit.


This is my dear friends baby (isn't she precious) i used the new kit as well because it also was perfect. I love hwen i have pictures that go with the kits..it means not alot of time searching and thinking about what to scrap. It felt good to scrap someone elses baby other than my own kids....sometimes you just need that change.

Totally loving the Nightingale kit!! With spring fastly approaching this kit is the perfect colors. If you want one i suggest you not wait to long. They are going at a rapid rate!

see you next week! It's Mardi Gras season so i am hitting the parades in New Orleans. Wish me Luck!!

Friday, February 20, 2009

Play Ball

Here's my entry for the current "Curly Girl" challenge we are hosting until next Friday. I used the new Cosmo Cricket "Lil' Man" line. Ok, seriously, if you have a boy, or 2, or 3 like me, this paper pack is a must have! It has 12 double sided papers, stickers, borders and a sheet full of the cutest boy sayings. I *ADORE* it! It has a great vintage feeling, but it's still vibrant.
I inked all the edges in black distress ink. I also used a few Jenni Bowlin Tickets for my journaling, and some of the Christmas Themed MM letters to record my date.

Have a GREAT weekend!! :)

Thursday, February 19, 2009

Nightingale Kit!


Nightingale includes the following:
Papers
Jenni Bowlin Studios
-Red Houndstooth
-Sparrow
-Red Cabbage Flower
7 Gypsies Caroline Journey Collection(Flocked)
-Bird
Collage Press Camden Collection(Double Sided)
-Compass
-Itinerary
-Harbor
-Island Retreat
BasicGrey Bittersweet Line
-Raspberry Cream
-Brittle
SEI Lovebirds Collection Collection (Double Sided)
-Flutter
-Love Nest
-Lovey Dovey
Creative Imaginations Creative Cafe Line
-Brown Floral/Large Dot
-Red DieCut
Making Memories Papier Collection (Double Sided)
-Houndstooth Poolside
-Geometric Mocha
-Small Floral Rouge (Die Cut)
-DieCut Lattice Poolside
Hambly Screen Prints Acrylic Overlay
-The Birdcages (brown)
5 Matching Bazzill Basics Cardstock Sheets
Embellishments
-1 sheet Collage Press "Day in the Life" Journaling Cards
-1 Pkg making Memories Papier Poolside Letter Stickers(110)
-1 Pkg SEI Love Birds Rub Ons
-1 Strip ArtChix Handy Red labels
-1 double sided ArtChix Chocolate Baroque foil border
-1 sheet BasicGrey Bittersweet Shaped Chipboard
-1 sheet 7 Gypsies "Memories" Stickers
-1 12" Creative Imaginations Journaling Strip (Red)
-1 Pkg Jenni Bowlin Block Alphabet Set (40 cards)
-1 Maya Road Scalloped Mini Chipboard Album
-1 Bottle Tim Holtz Distress Stickles
-6 Creative Imaginations Journaling Tickets (Kraft/Red)
-4 Collage Press Letter Cards (1 Lrg, 3 small)
-1 Large Creative imaginations Journaling Tag (Red)
-2 Vintage (60's) Bird themed playing cards
-2 "Sunshine and Ravioli" word tickets
-1 Yard Cream Tulle
-2 Maya Road Felt Beaded Blossoms (Cream and Brown)
-3 7 Gypsies Felt Leaves
-3 American Crafts Large Brads (Cream, Light Blue, Brown)
-4 Making Memories Poolside Clips
-7 BasicGrey Bittersweet Buttons
-4 assorted Prima Paper Blossoms
-2 Assorted 7 Gypsies Ribbon Slides
-3 "Every Jot and Title" tags (two numbers, one 5 W's)
-1 Yard Red stitched grosgrain ribbon
-1/2 Yard mini brown Rickrack
-1/2 Yard Creative Cafe light blue Corduroy Ribbon
$41.99 Click HERE to order!

Curly Girl


I had so much fun with this challenge -- I wound up doing quite a lot of digi work on the picture. Putting the writing on the picture was my take on curly girls cards. I also used the Nightingale kit. Such a lovely kit:)

Wednesday, February 18, 2009

A Little More Fancy....

Noel's latest challenge has me so excited... we have the most adorable inspiration point! Go check out CurlyGirlDesign and don't blame me if you get sucked in there for a while!

I decided to use a mixture of things as my inspiration: the quote from one of her cards, her style of artistic layering, and the general home page design. It all incorporated into this layout.
Since the Curly Girl site is so full of mixed media, I got a little "artsy" and messed around with some inks and the distress Stickles that are included in the kit. I really had fun smearing them with my finger onto the title block, then adding them to the felt flower and the chipboard flourish. They add a really cool touch.
This is all from the new Nightingale kit except for the corrugated cardboard & strip of Narratives paper, which was in the Love Story kit, and some bling, added by my own stash!

Tuesday, February 17, 2009

Nightingale....

I am having so much fun creating with Noel's newest kit, Nightingale. It so packed with gorgeous papers and embellishments! I created this LO for the challenge during our Valentine Crop. The challenge was to list ten things about yourself you like/love. It was a difficult challenge for me, as I tend to focus on all the things I dislike about myself. But I managed to get a list of ten together! All the items used in this LO are in the kit, with the exception of the title (Thickers found in Noel's store) and the lace, which was part of my stash.


This second LO also used the Nightingale kit. This is my daughter's "professional" cheer leading picture. I was so pleased with it! (She often doesn't take nice pics!) Since her uniform is red and white, I knew the Nightingale kit was perfect! I went a bit crazy with the layered papers and embellishments. I used the Tim Holtz distressed stickles for the swirls and to fill the center of the buttons. (This is also in the kit! ) The lace was again from my own stash.


Can you see the center of those buttons? Cool huh?
You can go HERE to check out the kit! They are going fast.........
Have a great day!!!

Monday, February 16, 2009

Nightingale Layouts

Hi Everyone! Jana here! I hope you have been enjoying a lovey-dovey Valentine's weekend with your family!

We had a great time with all of you at our Valentine's Crop-a-thon! Thanks for sharing your beautiful creations with us! You blew us away with your talent and left us feeling inspired! :D :D :D

Here are the layouts I created for the challenges using the brand-new Nightingale Kit (available now!).


I also created this layout for the next Noel Mignon Challenge that will be going up today! :D I can't wait to see what everyone does for this one! :D It was a lot of fun!

I chose this quote to go with this picture of my two youngest daughters because Maryn is constantly giving up her things to make Camryn happy. She is such a good big sister! When Camryn was going through her "Croc-phase" she would literally take the shoes off of Maryn's feet. And Maryn was always willing to oblige . . . such a sweet sister-relationship! And I'm glad I got it documented with this challenge! :D
Come and play along!

Sunday, February 15, 2009

Nightingale is Ready to Roll

The newest kit Nightengale is ready to go. You can visit the store and pick yours up. I have a feeling this one will fly off the shelves as well so better get it now.

here is a little something i did with it so far. Still plenty more to come


This was using the Blue Skies kit (sold out). It is for the current prompt at Forward Progress Promt


If you haven't picked up the Cogsmo line from Cosmo Cricket i suggest you hop over here. and scoop one up. This is such a great boy line. One of my favorites. I made this for Mason (my son) who loves to hang stuff upstairs all around and on his door. Now Melana is requesting one with crowns and tiara's {deep sigh} the princess has spoken so i must get off to make one...

Happy Crafting!
See you next week and remember today is the last day to sign up for my class. If you are interested email me at greta.adams@gmail.com

Saturday, February 14, 2009

Nightingale

Is up for Pre-order Sunday morning!! Click HERE to get yours ordered! They begin shipping this Monday! Also, take some time to check out all the new arrivals, there are lots of new CHA goodies to get your hands on!!

Using Brushes in Photoshop (and making your own digi stuff!)

Are you intimidated by digital stuff? Me too, don't worry- I'm right there with you!

I've been picking up things here and there, but I'm definitely not "there" yet... but I wanted to share one of my favorite tricks and give you a little Valentine's treat today!

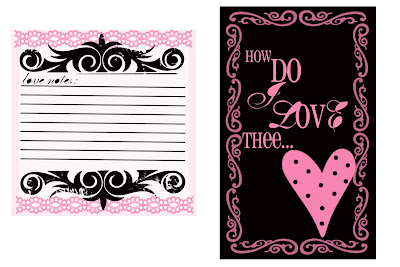
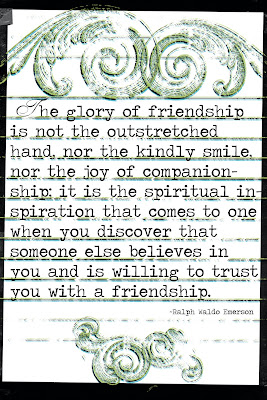
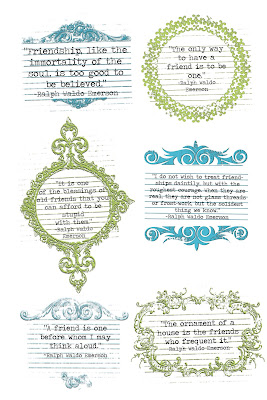
Below are some journaling cards/embellishments that you can save and print out and use. Just click on the images (it'll open them up big) and then right click and save image.

I don't have a great printer at home, so when I make these, I size them at 4x6", so that whenever I'm printing off photos, I just add them to the cart and presto- a set of printed digital elements the next time I get pics!


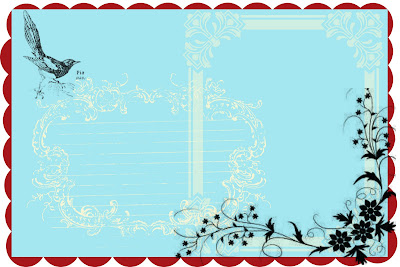
These next two I designed specifically to go with the new Nightingale kit- now on sale!


I'm going to teach you today how you can make some of these yourself- or at least, begin experimenting! It's super easy and fast... I made these over the course of a few minutes each!

In order to do this project, you're going to need to open photoshop- I use CS for this tutorial.

Then you need to go to one of these sites and download some brushes; save them and extract them somewhere where you can find them easily.

My Photoshop Brushes

BrushEezy

Next, open a new document in photoshop. You can do these on top of a photo or just on a 4x6 white document.
Click on this little paintbrush tool.
Then click up there on the tool bar on the little "down" arrow and a window will open with your default brushes. Your program will come with a couple loaded. If it looks weird or hard to see them, we can change that in a sec.
Click on the little right hand arrow and a new menu will pop up. Click on the "large thumbnails" thing so that a checkmark shows up next to it- that will make it easier to see your brushes. Then click on "Load Brushes" and you'll be able to go load those brushes you downloaded earlier. It's as easy as clicking on the icon and clicking "load!"
You can then click on the little thumbnail of whatever brush you want to play with, and start clicking away on your document. Think of it as "stamping" digitally. A few tips I've learned:

Change up the colors and layer brushes using different shades. Just click on those double squares I've got circled and select your colors!


Sometimes you'll click on your brush and nothing will show up. It's 'cause it's too big. You can change the size by lowering those numbers I have circled, OR you can use the [ keystroke to make it smaller.

They're fun added to photos too, like this!
Have fun experimenting- you can layer lots of different kinds of brushes and add text to make really unique journaling blocks or pre-made accents for your pages- custom made for you!

Here's a list of direct links to some of the brushes I used on the journaling blocks above:

Fancy Frames


Lace

Hearts

Vintage Hands